Here is the protagonist for the fantasy game project. It was based on the concept art of one of my group members. i started off with dynamesh Zbrush as I feel more comfortable going from high poly to low poly workflow. I forgot about belt straps, but i think it still looks good. To improve it I could look more at the concept art and make it look more alike. In this one I did use the concept art as a reference, but later on I just left it behind; I think the character still looks quite similar to the concept
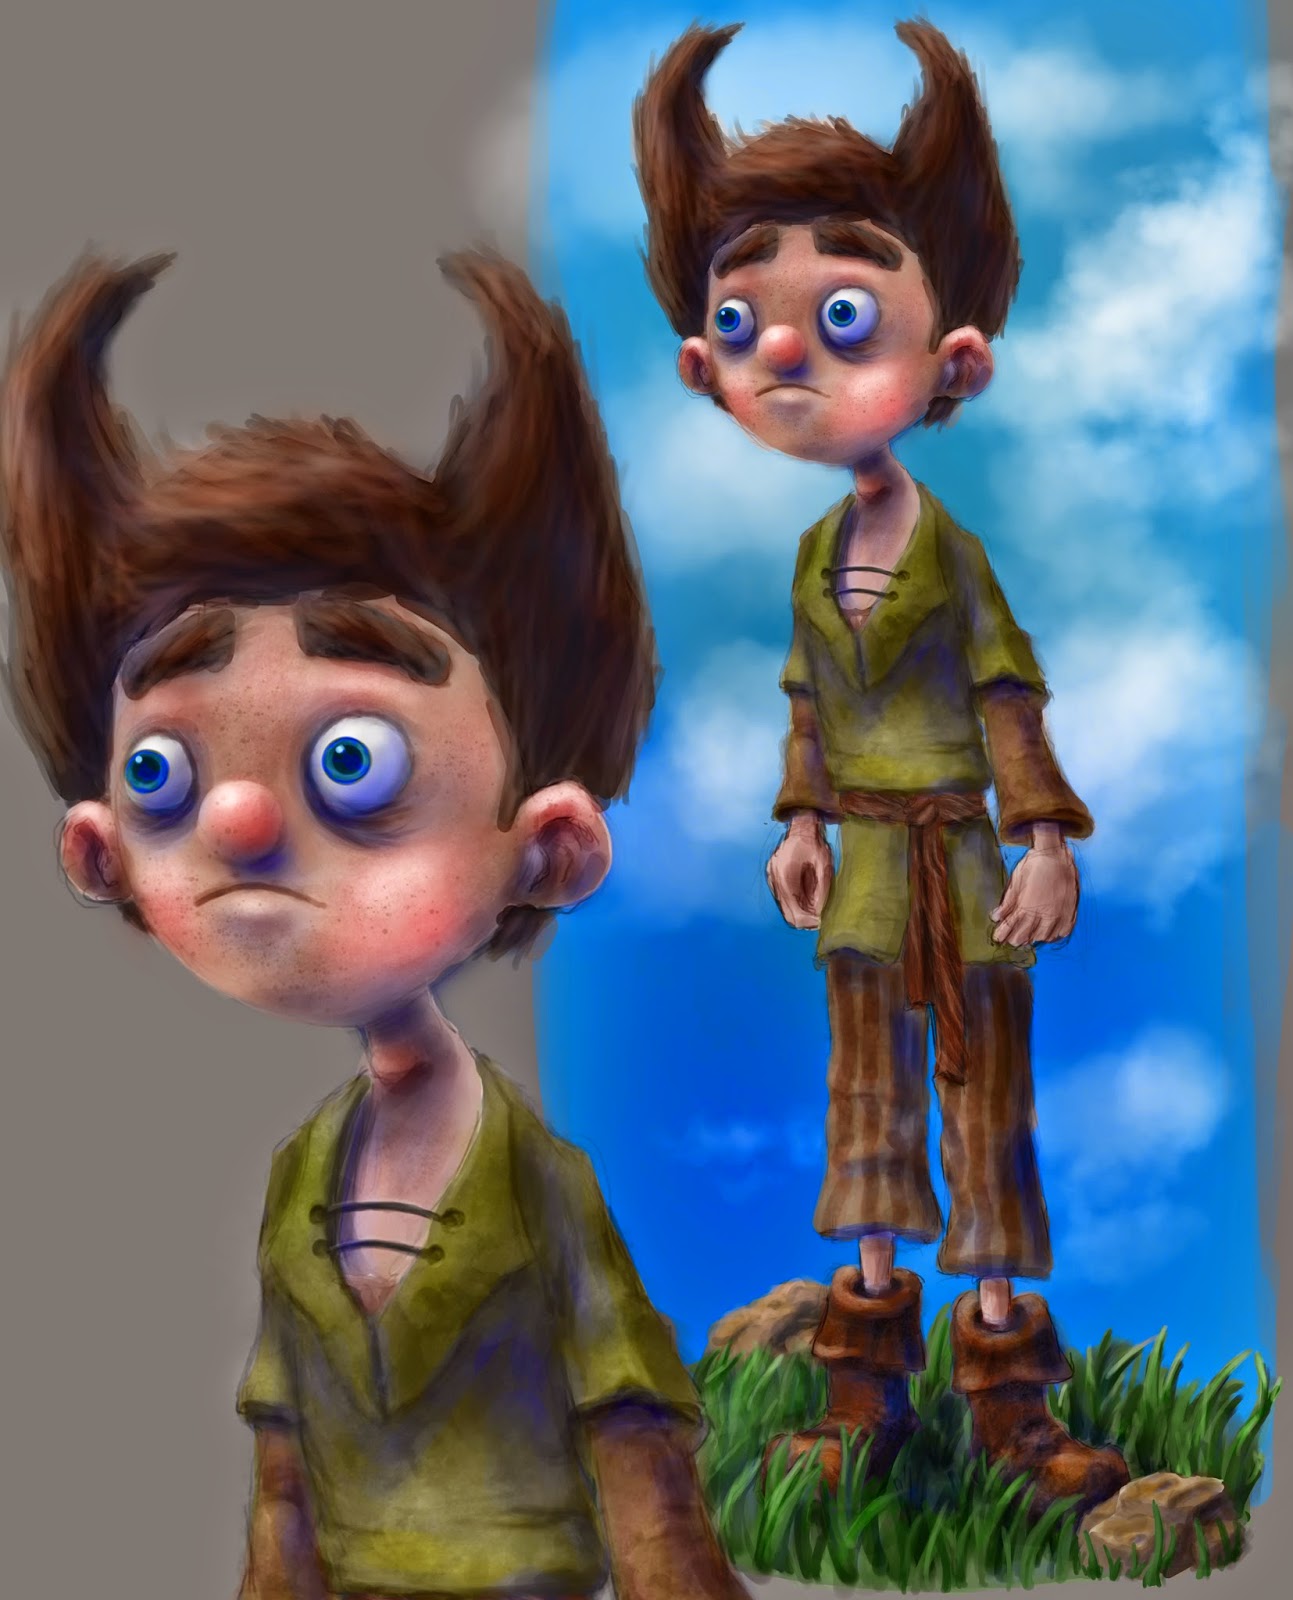 |
| Concept Art done by Alex P. |
Here I began the retopology in Maya. Retopology is always my least favourite part of the process (and of course Uvs). I tried to make the loops go around the arms and facial muscles. However I made a mistake and made the arm loops too far away from the shoulders, causing a visible seams later on. After making the Uvs I proceed with making the rig. Following a tutorial (as it was my first time) everything was going pretty well but when I mirrored the control curves I encountered some issues; the orientation of the curves was facing a wrong direction and I couldnt fix it. After a long time of struggle, i found out there's a premade rig inside Maya, It DID hurt to find this out after such a long time.
After rigging the character and painting skin weights, i had a go at making the eyes control curves. It did work, but after importing the model into the engine, the eyes dissapeared. So I removed the control curves. Now I think the issue was in parenting the eyes to the rest of the model, instead of smooth binding them.
One issue I encountered was wrong thumb bone placement. It somehow got misplaced and I didn't notice until the character was animated and put into the game. every animation inside the engine causes the thumb to look broken, which isn't good. To avoid It I could be more careful and check each bone for correct placement.

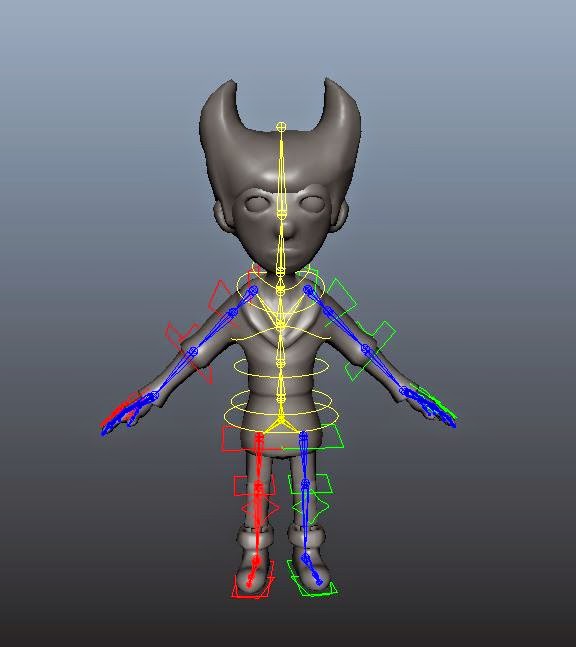 |
| Attempt at rigging |

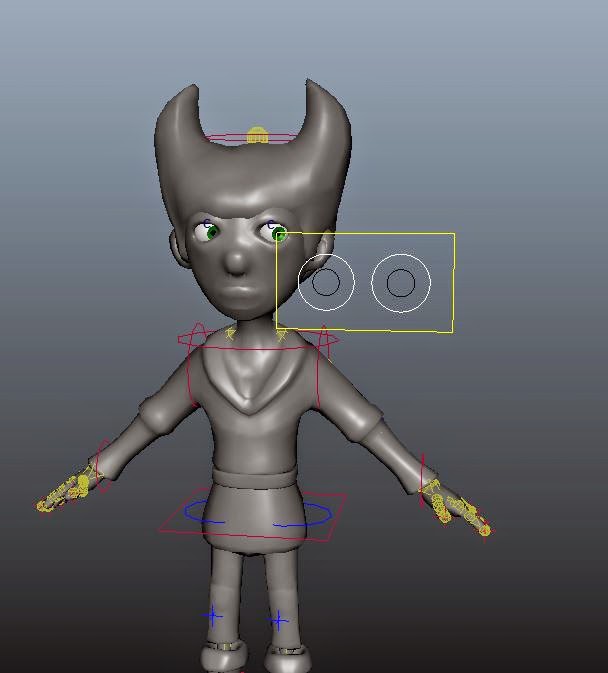 |
| Attempt at eye rig |
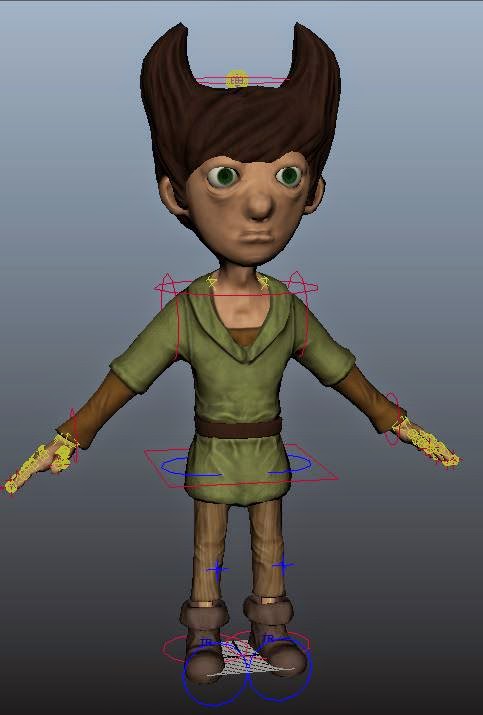 |
| Final model |
The diffuse map was made inside DDo with Ambient occlusion on top of it; first I started off with a basic color scheme, there I let DDO take me through it's process. However Normal maps were done inside Maya separately, then put together inside photoshop. I did it this way because I made a huge mistake of re positioning the model (low poly) before baking the maps etc. and later on it was hard to align the low poly and high poly models.
 |
| Pre DDO |
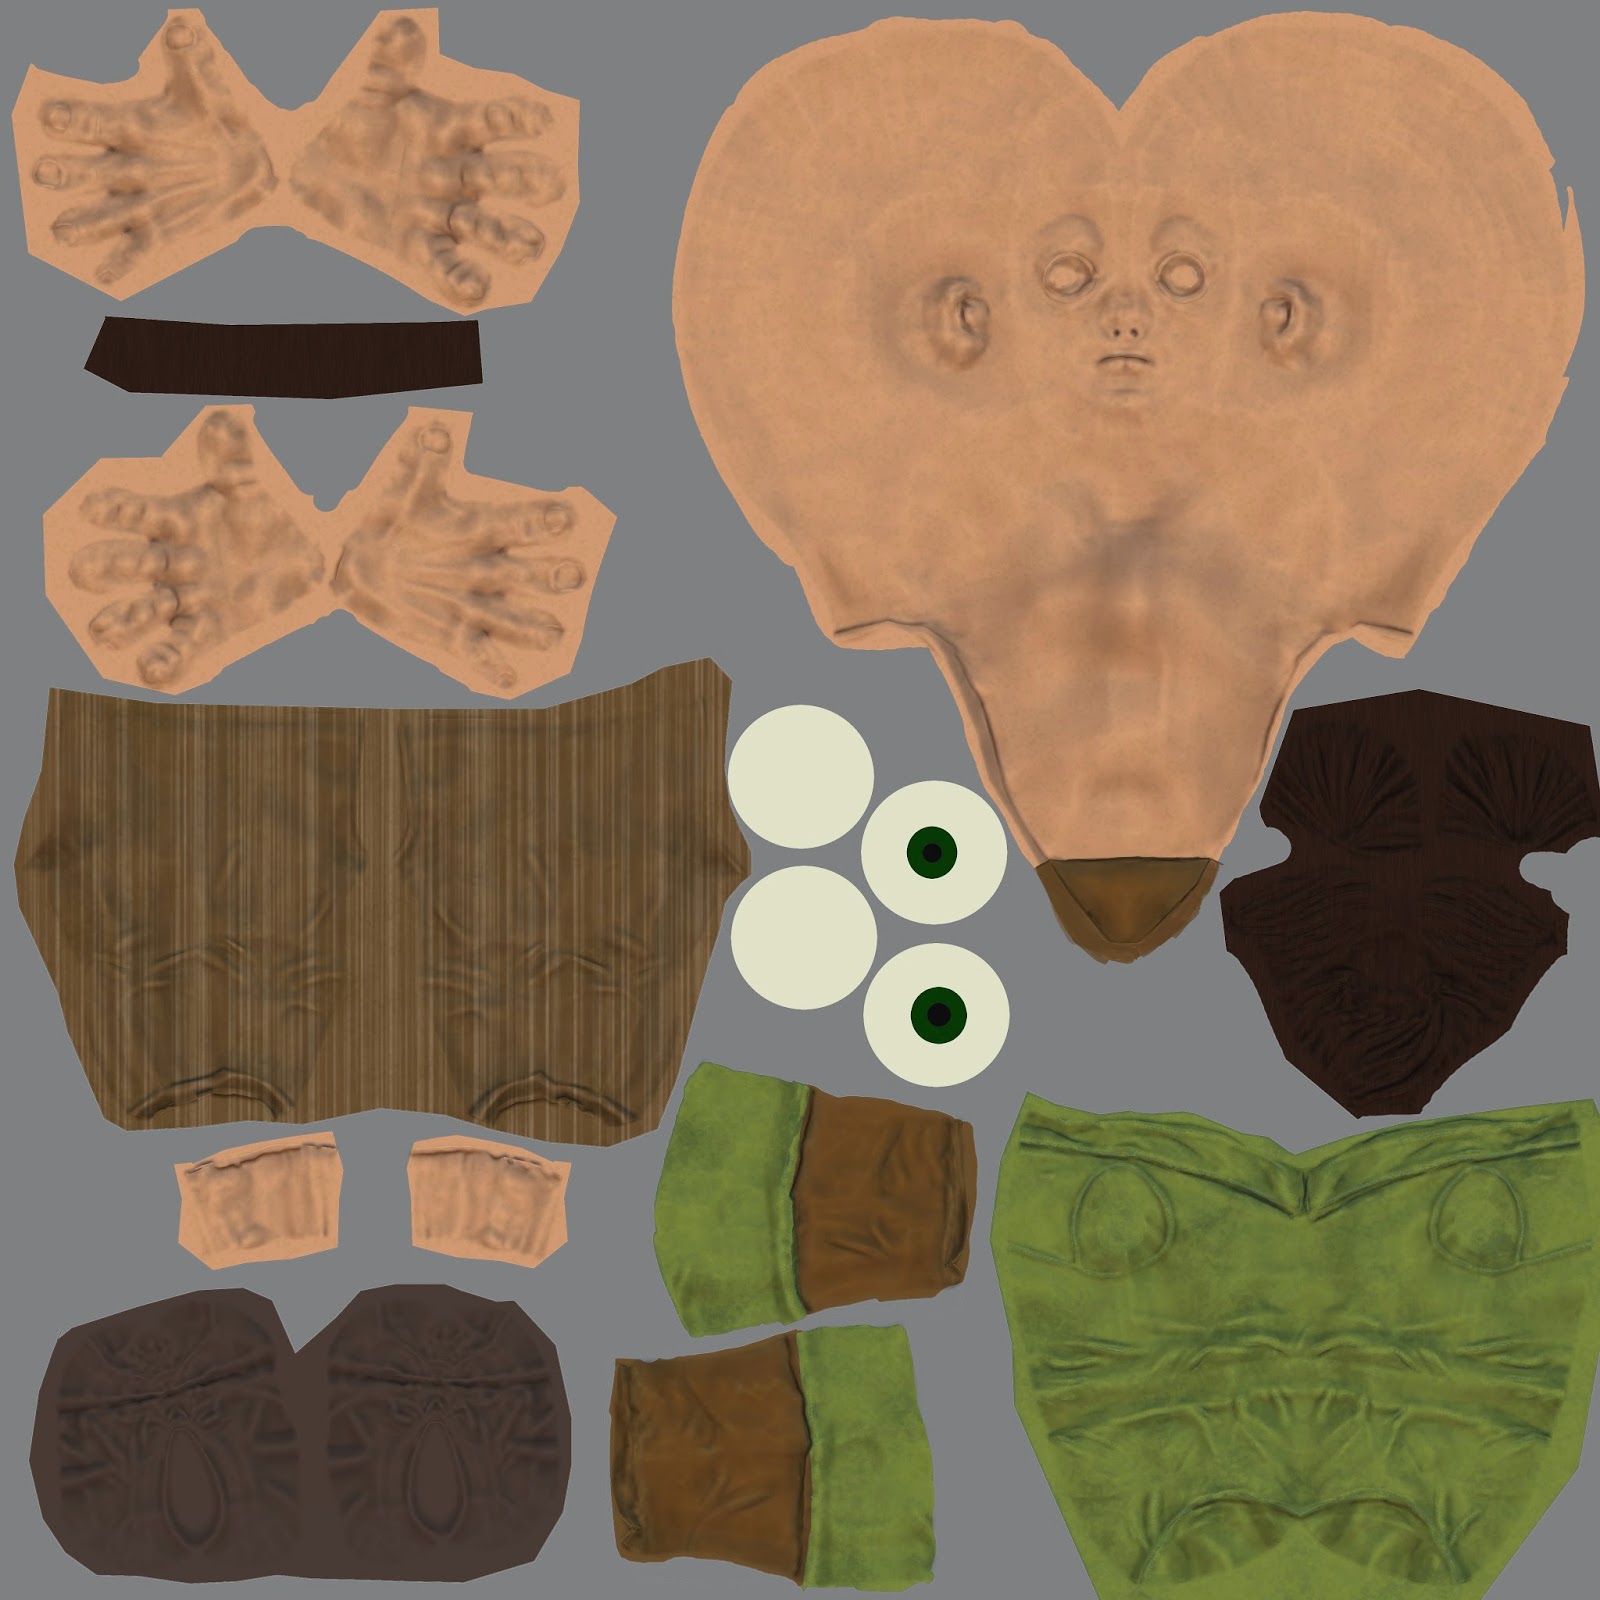 |
| After DDO |


No comments:
Post a Comment